IMMS goes live May 6, 2025
Symphony will no longer display a transit pop-up to tell you when an item should go to the Sort Center, if there is no hold on it.
- While most of the collection is being shared, IMMS will route items to the Sort Center if you don’t have room for them on your shelves.
- At libraries with AMH, AMH automatically routes items correctly.
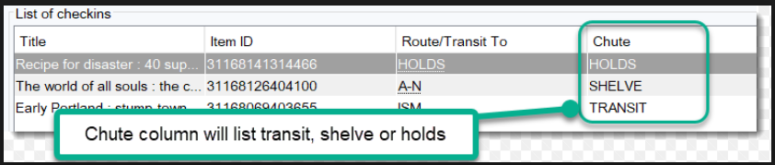
- Libraries without AMH, or staff checking in manually, need to watch the Chutes column on the Check In screen to see which items should go in Transit.
Incoming crates are processed with IMMS.
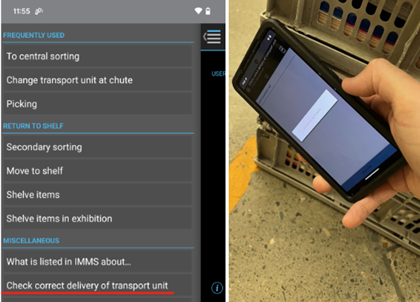
- Return and hold crates are scanned with IMMS, using the “Check correct delivery” function. This tells IMMS the crates have arrived, but doesn’t check the items in.
- Return crates are processed through AMH, especially for locations with larger AMHs. If not using AMH, use the IMMS ‘Put in Transport Unit’ function to move the items to a cart.
- Hold crates are processed through AMH or Symphony Check In.
- TCS (Tote Checkin System) is no longer used.
Holds processing will change.
- Outgoing holds are routed by IMMS as they are pulled and scanned.
- Staff and volunteers will use AMH or Symphony Check In to process local holds.
- The Trap Holds Wizard can’t be used.
July 2025
Quick Facts
- See these AMH and IMMS pages:
- AMH Check In or Checking in items without an AMH.
- IMMS and access/circulation and IMMS Quick Guides.
- IMMS Quick Guides about Moving items between Transport Units and Switching out Transport Units at Chutes.
- Check in incoming Interlibrary Loans, Iron Mountain periodical requests, and Tech Lending items using the Receive Transit Wizard in Symphony. These items are not checked in with IMMS.
- When checking in items that are “Lost and Paid” there is a pop up message that says “Patron credit account does not exist. Do you want to create a credit account?", click Yes. The patron is automatically refunded this way.
- Crate colors: Outgoing crates can be in any color, except black. Incoming returns will be in red or gray crates and holds will be in yellow or blue crates.
Jump to: Crate check in, Route to other location, Holds for home location, Holds for another location and Print check in receipts.
Procedure
- See the Checking in with IMMS workflow or Checking in without AMH Quick Guide.
- Important:
- Check in Interlibrary Loans, Iron Mountain periodical requests, and Tech Lending items using the Receive Transit Wizard in Symphony. These items are not checked in with IMMS.
- This procedure applies to local check in (bookdrop) only. For return crate processing, see this workflow.
- Use Symphony to check in items if your location doesn’t have an AMH, or if your AMH is down.
- Make sure your Holds and Shelve Chutes have Transport Units (TUs) attached.
- Check in an item using Symphony. Symphony will assign the item to a Chute.
- HOLDS - Print and insert the hold slip, and place the item onto the TU attached to the Holds chute.
- SHELVE - Place the item onto the TU attached to your Shelve chute.
- TRANSIT - Place the item into any outgoing TU crate of any color, except black. There is no need for any IMMS action.
IMPORTANT: Symphony will no longer display a transit pop-up to tell you when an item should go to the Sort Center, if there is no hold on it. Watch the screen to see what Chute each item is assigned. While most of the collection will be shared, IMMS will route items to the Sort Center if you don’t have room for them on your shelves.
- Replace full Holds and Shelve TUs as needed.
-
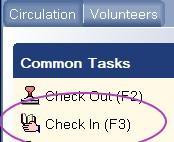
Under the Common Tasks tab, select Check In wizard or (F3) on the keyboard.
-
Place the item on the RFID pad. The Item ID will display the barcode number.

- Repeat step 2 to continue checking in items. Select Close at the bottom of the screen when finished.
Crate check in with IMMS
- All return and hold crates will be scanned with IMMS, using the “Check correct delivery” function. This tells IMMS the crates have arrived, but doesn’t check the items in.
- Return crates will be processed through AMH, if available. Locations with smaller AMHs may skip sorting with AMH. If not using AMH, use the IMMS ‘Put in Transport Unit’ function to move the items to a cart before shelving.
- Hold crates will be processed through AMH or Symphony Check In.
- Items from crates will not show as available or ready to pick up until they are on the shelf or holdshelf.
- Use of TCS, the Tote Checkin System, ended May 6, 2025.
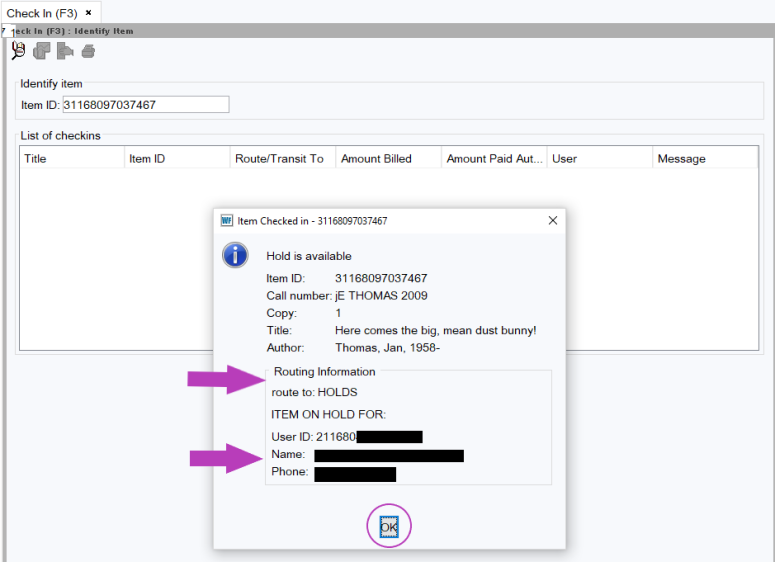
Check In - Holds for home location
Holds checked in at a patron’s home branch will display a Hold is available alert. Select OK to print the hold slip and put it inside the item. The patron will be notified the next day that their hold is available. Put the item on the Hold TU. Switch out the hold cart TU when it's full.
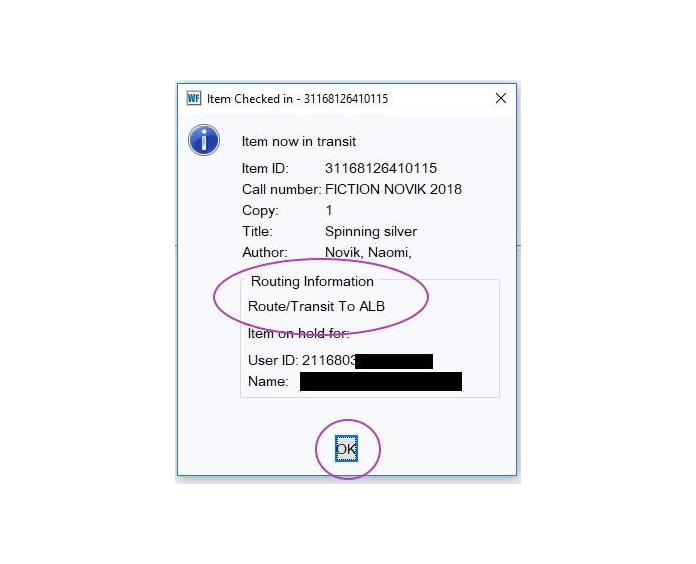
Check In- Holds for another location
Holds that will be picked up at a different location will show an item is in transit alert. Click OK and put it in a mixed return/hold crate to send to the Sort Center. Switch out the hold crate TU when the crate is full.
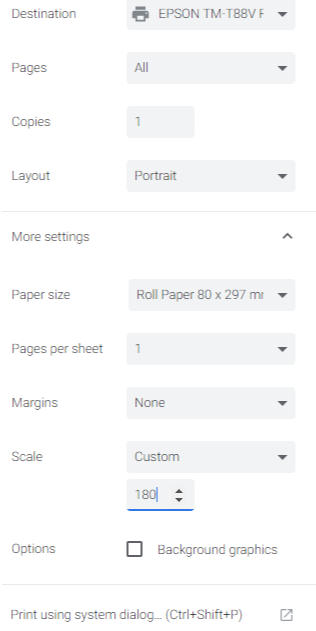
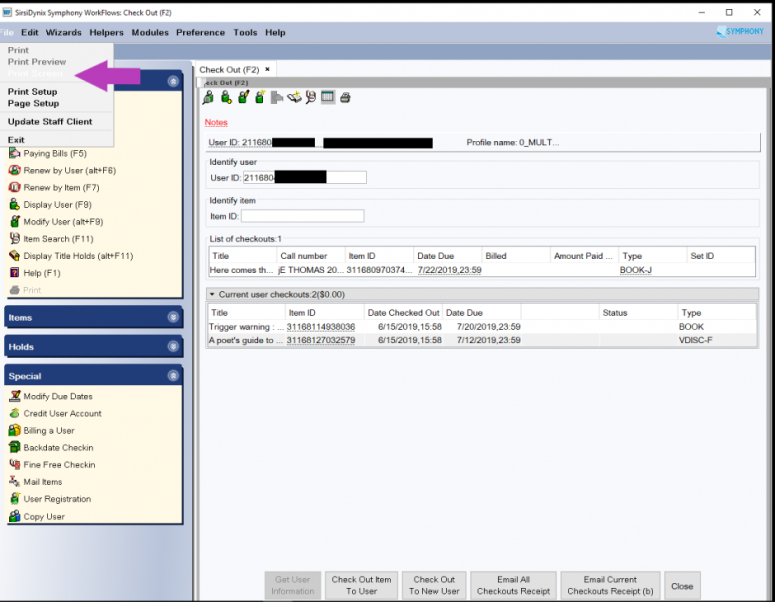
Print check in receipts
- Check in item(s)
-
In the File menu (ALT F), select Print Screen
-
Right click anywhere on the page that opens and select Print.
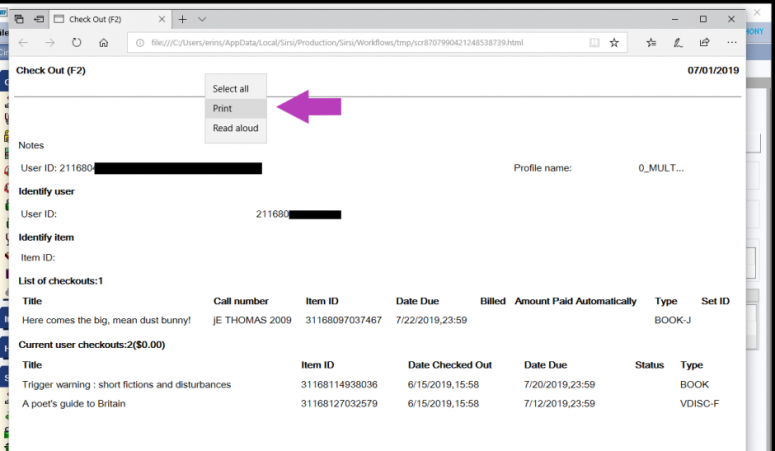
- The print settings page will look slightly different, depending on the default browser (such as Chrome or Firefox) set for the computer being used.
In the dialog box, select the printer (Epson or Networked) that is the most easily accessible for you to help the patron in the moment.
Use the image below as a guide to adjust the settings so that the most legible copy of the receipt for the patron will be printed.